
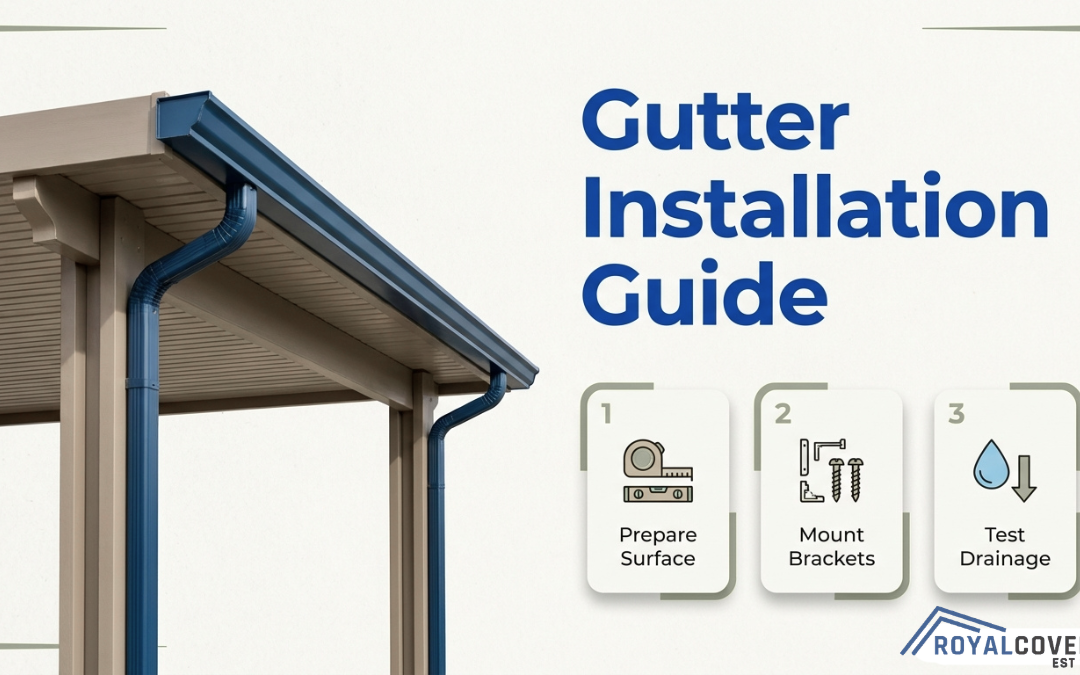
Attaching gutters to an Alumawood pergola is the process of mounting aluminum gutter channels to the structure’s hollow fascia extrusions using pop rivets, UV-rated sealants, and a precise 1/4-inch-per-10-feet slope toward downspout outlets.
This guide covers the reasons gutters protect your outdoor investment, compatible materials and fasteners for aluminum structures, step-by-step installation methodology, slope and drainage engineering, common mistakes that void warranties, and long-term maintenance practices.
Uncontrolled runoff from a solid-roof pergola erodes landscaping, stains hardscapes, and pools near foundations. Gutters channel that water to designated drainage points, preserving both patio surfaces and adjacent plantings.
Alumawood’s hollow 6061-T6 aluminum extrusions require specific hardware. K-style aluminum gutters mount flush to the flat fascia, large flange pop rivets grip hollow channels without stripping, and flexible polyurethane or silicone sealants absorb thermal expansion cycles.
We walk through fascia inspection, slope marking, bracket mounting at 24-inch intervals, channel hanging, downspout connection, and joint sealing with a water-flow test to confirm proper drainage before final curing.
Incorrect pitch is the most frequent DIY failure; a level-looking gutter actually needs that subtle grade to prevent standing water and overflow. Unauthorized modifications can also void the Alumawood material and finish warranty, making method selection critical.
In desert climates, biannual cleaning keeps channels clear of dust buildup, and periodic bracket inspections catch thermal-stress loosening before drainage fails. For complex layouts or warranty-sensitive structures, professional integration from the design phase eliminates aftermarket risk entirely.
Why Would You Add Gutters to an Alumawood Pergola?
You would add gutters to an Alumawood pergola to prevent water damage, protect your patio surface, and preserve surrounding landscaping from uncontrolled runoff.
What Water Damage Can Occur Without Gutters?
Water damage without gutters includes foundation erosion, patio surface staining, soil displacement, and structural cracking caused by uncontrolled runoff. Standing water near a building foundation after rain creates an environment for soil erosion and potential structural cracking, according to Camrock Foundations.
Without a gutter system, rain sheets off the pergola’s solid panels and concentrates along the drip edge. This concentrated flow erodes mulch beds, splashes mud onto walls, and pools on concrete or pavers. Over time, repeated saturation weakens the subgrade beneath hardscape surfaces and can even direct moisture toward your home’s slab. For a structure designed to keep you dry, neglecting drainage defeats the purpose entirely.
How Do Gutters Protect Your Patio and Landscaping?
Gutters protect your patio and landscaping by channeling rainwater into downspouts and directing it away from hardscapes, plant beds, and structural foundations. According to a 2025 Hippo Insurance report, approximately 41% of homeowners experienced non-flood water damage, with water pooling in yards being a significant concern for maintaining outdoor hardscapes.
A properly pitched gutter system captures runoff at the fascia line and routes it to a designated drainage point. This prevents:
- Staining and mineral deposits on patio pavers or stamped concrete.
- Soil washout around foundation plantings and flower beds.
- Standing water that breeds mosquitoes and degrades outdoor furniture.
- Splash-back damage to the pergola’s Aluma-Shield finish.
Controlled drainage preserves both the investment in your outdoor living space and the structural integrity of adjacent surfaces. With water management addressed, selecting the right tools and materials ensures a lasting installation.
What Tools and Materials Do You Need for the Project?
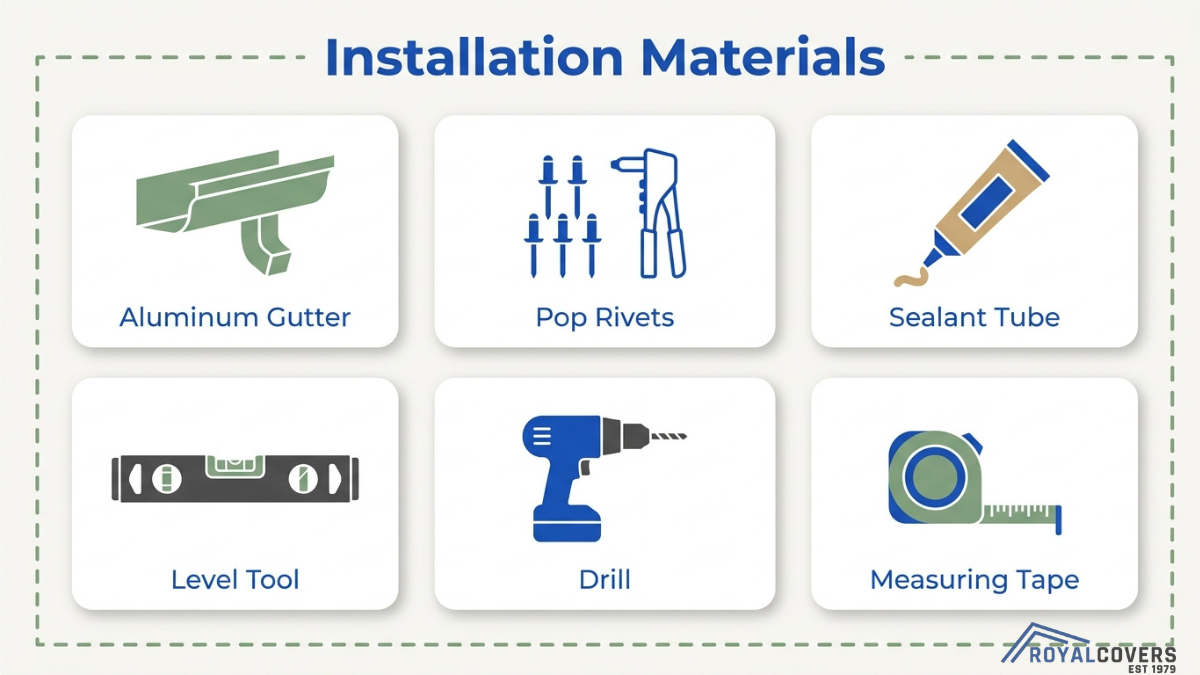
The tools and materials you need for this project include aluminum-compatible gutters, specialized fasteners, UV-rated sealants, and standard measurement tools. The following sections cover gutter profile selection, safe fastener types, and leak-prevention sealants.
What Type of Gutter Works Best on an Alumawood Pergola?
The type of gutter that works best on an Alumawood pergola is a 5-inch aluminum K-style gutter. K-style gutters feature a flat back that allows direct mounting to the Alumawood fascia channel, and their profile holds higher water capacity than half-round alternatives. According to Window World of Philadelphia, K-style gutters are the most common residential profile, preferred for modern homes due to this flat-back design and superior drainage capacity.
Matching aluminum gutter material to the aluminum pergola eliminates galvanic corrosion risk. A 5-inch seamless system handles approximately 5,500 square feet of drainage area, which exceeds most residential pergola footprints. For larger structures, a 6-inch system manages up to 7,900 square feet.
What Fasteners Are Safe for Alumawood Without Causing Damage?
The fasteners safe for Alumawood without causing damage are large flange pop rivets in 3/16-inch or 1/4-inch sizes. According to DoItYourself.com, these rivets provide a secure hold in hollow-channel aluminum extrusions where traditional screws might vibrate loose over time.
Pop rivets work particularly well because they:
- Distribute load across a wide flange area, reducing stress on thin aluminum walls.
- Create permanent connections without the thread-stripping risk of self-tapping screws.
- Require only a small pilot hole, minimizing material removal from the fascia.
Stainless steel rivets paired with aluminum mandrels prevent galvanic corrosion at each attachment point. Avoid over-sized drill bits that compromise the structural integrity of hollow extrusions.
What Sealants Prevent Leaks at Gutter Attachment Points?
The sealants that prevent leaks at gutter attachment points are polyurethane and silicone-based formulations rated for outdoor UV exposure. These sealants accommodate the thermal expansion of aluminum, which has a coefficient of approximately 23 x 10⁻⁶ /K, significantly higher than wood.
Key sealant characteristics to prioritize:
- UV stability for prolonged sun exposure without cracking or yellowing.
- Flexibility to absorb seasonal expansion and contraction cycles.
- Waterproof adhesion to both aluminum gutter material and the Alumawood finish.
Apply sealant around every rivet penetration and along end cap joints. Rigid sealants will crack as temperatures fluctuate, eventually creating leak paths that defeat the entire drainage system.
With materials selected, preparing the pergola surface ensures a secure, lasting installation.
How Do You Prepare the Alumawood Pergola for Gutter Installation?
You prepare the Alumawood pergola for gutter installation by inspecting the fascia, measuring the correct slope, and cleaning the mounting surface. Each step ensures a secure, lasting attachment.
How Do You Inspect the Fascia for Structural Integrity?
You inspect the fascia for structural integrity by examining the aluminum extrusion for dents, warping, or loose connections at the rafter ties. The Alumawood system uses high-strength 6061-T6 grade aluminum alloy, which provides a tensile yield strength of 276 MPa for structural components. Check that the fascia sits flush and flat along its entire length, since any bowing will prevent the gutter from seating properly. Confirm all existing fasteners are tight and that no sections have separated from the main frame. A structurally sound fascia distributes the added gutter weight evenly and prevents future bracket failure.
How Do You Measure and Mark the Correct Slope?
You measure and mark the correct slope by establishing a 1/4-inch drop for every 10 feet of gutter run toward the downspout location. According to Smithrock Roofing, this standard industry pitch ensures critical water flow and prevents pooling. Start by marking the high point at the end farthest from the downspout, then use a chalk line snapped between the high mark and the calculated low point. Verify the line with a level. Accurate slope markings at this stage prevent the most common DIY installation failure: water standing in the channel and eventually overflowing.
How Do You Clean the Mounting Surface Before Attaching?
You clean the mounting surface before attaching by wiping the fascia with a mild detergent solution and rinsing thoroughly. Alumawood features a baked-on Aluma-Shield paint system that repels dirt, dust, oil, and stains, so most buildup comes off easily with a damp cloth. Remove any cobwebs, oxidation residue, or chalky film that could compromise sealant adhesion. Allow the surface to dry completely before applying any sealant or positioning brackets. A clean, dry fascia allows polyurethane or silicone sealants to bond properly against the aluminum.
With the pergola fully prepped, the next step is mounting gutter brackets to the fascia.
What Are the Steps to Attach Gutters to an Alumawood Pergola?
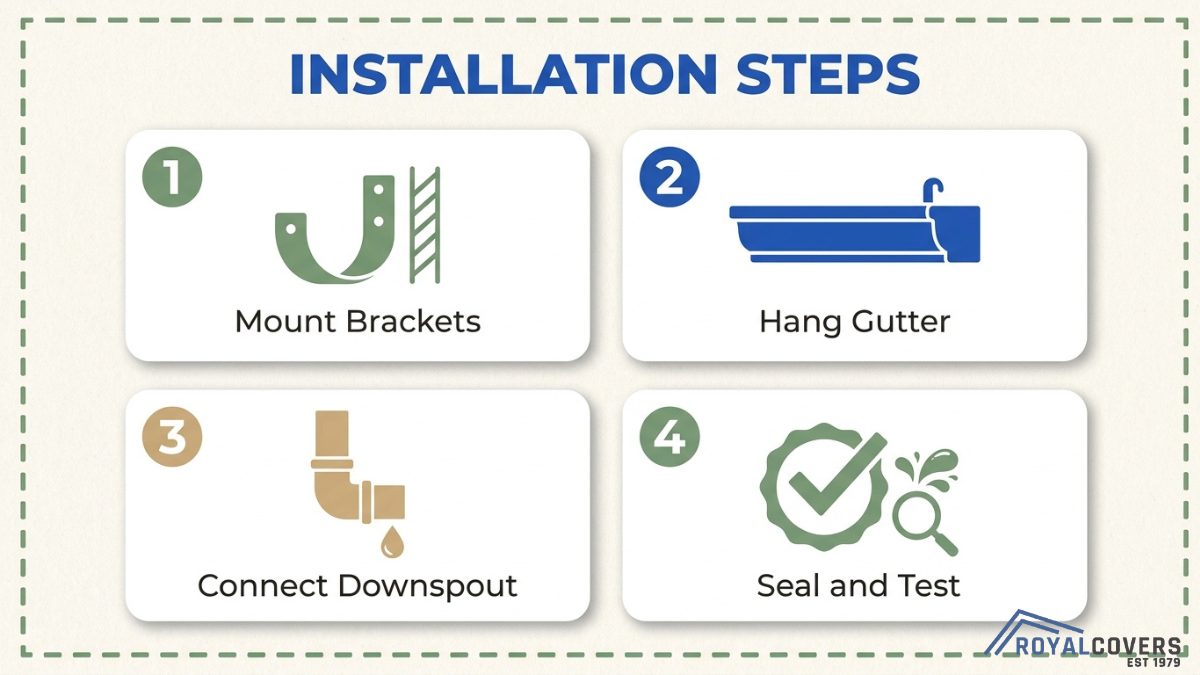
The steps to attach gutters to an Alumawood pergola involve mounting brackets, hanging the gutter channel, connecting downspouts and end caps, then sealing joints and testing drainage.
How Do You Mount the Gutter Brackets to the Fascia?
You mount the gutter brackets to the fascia by positioning them along your pre-marked slope line and fastening with pop rivets into the aluminum extrusion. According to DoItYourself.com, 3/16-inch or 1/4-inch large flange pop rivets provide a secure hold in hollow-channel aluminum extrusions where screws might vibrate loose over time.
Space brackets every 24 inches for adequate support. Steps include:
- Align the first bracket at the high point of your slope mark.
- Drill a pilot hole through the fascia face using a cobalt bit.
- Insert a large flange pop rivet and compress with a rivet gun.
- Repeat at 24-inch intervals, verifying slope alignment with a level.
Avoid overtightening, which can deform the hollow aluminum channels.
How Do You Hang and Secure the Gutter Channel?
You hang and secure the gutter channel by snapping it into the mounted brackets, starting at the high end and working toward the downspout outlet. Lift the gutter into the front lip of each bracket, then rotate the back edge upward until it clicks into the rear hook.
Once seated, secure the channel to each bracket with a locking clip or additional rivet. Check that the gutter maintains consistent contact along the fascia with no gaps. For pergolas with runs exceeding 20 feet, use an expansion joint at the midpoint to accommodate aluminum’s thermal movement during temperature cycles.
How Do You Connect Downspouts and End Caps?
You connect downspouts and end caps by attaching an end cap to the gutter’s closed end, then installing a drop outlet and elbow assembly at the downspout location.
- Press the end cap onto the gutter section and secure with pop rivets on each side.
- Cut a downspout hole in the gutter bottom using aviation snips or a hole saw.
- Attach the drop outlet over the hole and rivet it in place.
- Connect elbows to angle the downspout toward the wall, then secure vertical sections with mounting straps every 36 inches.
Direct the downspout base away from the foundation to prevent water pooling near the structure.
How Do You Seal Joints and Test for Proper Drainage?
You seal joints and test for proper drainage by applying sealant at every connection point, then running water through the system to verify flow. Polyurethane or silicone sealants rated for outdoor UV exposure accommodate aluminum’s thermal expansion without cracking.
Apply sealant to:
- End cap seams
- Drop outlet connections
- Slip-joint overlaps between gutter sections
After curing for 24 hours, pour water at the high end using a garden hose. Watch for pooling, dripping at joints, or overflow at seams. The standard pitch of 1/4-inch drop per 10 feet should produce steady flow toward the downspout with no standing water.
With the gutter system fully installed and leak-tested, proper slope and downspout positioning determine long-term performance.
What Slope and Drainage Considerations Matter Most?
Proper slope and drainage determine whether gutters on an Alumawood pergola function correctly or cause water damage. The two critical factors are pitch per foot and downspout positioning.
What Is the Correct Pitch Per Foot for Pergola Gutters?
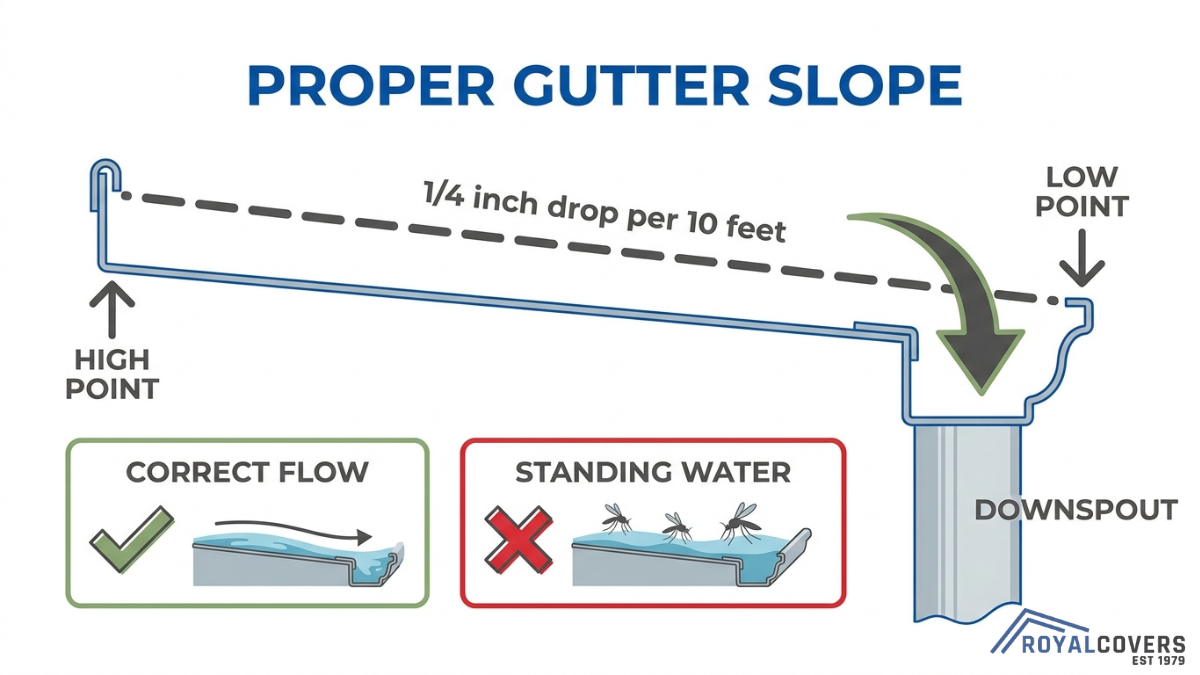
The correct pitch per foot for pergola gutters is 1/4 inch of drop for every 10 feet of gutter run toward the downspout. This standard ensures water flows continuously without pooling inside the channel.
According to Smithrock Roofing, this 1/4-inch-per-10-feet rule represents the standard industry specification for maintaining critical water flow and preventing standing water. On a typical Alumawood pergola spanning 15 to 20 feet, even this slight grade creates enough momentum to clear debris-laden water during storms. Too little pitch causes overflow at the far end; too much pitch creates visible sag that looks unprofessional against the pergola fascia. For most residential pergola runs, marking the high point at one end and snapping a chalk line to the low point at the downspout location provides an accurate visual guide during bracket installation.
Where Should You Position Downspouts for Best Flow?
You should position downspouts at the lowest point of the gutter run, typically at one end of the pergola or at both ends for runs exceeding 30 feet. Placing downspouts at corners keeps them visually discreet while directing water away from foot traffic areas.
For single-direction drainage on shorter pergolas, one downspout handles flow adequately. Longer spans benefit from a center-high configuration that slopes in both directions toward downspouts at each end. A 5-inch seamless gutter system handles approximately 5,500 square feet of drainage area, which exceeds most pergola roof surfaces. Regardless of placement, each downspout should discharge at least 4 feet from the home’s foundation to prevent soil erosion and moisture intrusion. For most installations, prioritizing structural corners keeps the system clean and functional.
With slope and positioning established, avoiding common installation mistakes protects your work long-term.
What Mistakes Should You Avoid During Installation?
The mistakes you should avoid during installation include over-drilling into hollow aluminum channels, setting incorrect gutter slope, and making unauthorized modifications that void your warranty.
What Happens If You Over-Drill Into Alumawood?
Over-drilling into Alumawood compromises the structural integrity of hollow-channel aluminum extrusions. The Alumawood system uses 6061-T6 grade aluminum alloy with a tensile yield strength of 276 MPa, but excessive or misplaced holes weaken these thin-walled profiles. Consequences of over-drilling include:
- Cracked or split channel walls that cannot hold fasteners securely.
- Compromised weather sealing where water infiltrates the hollow cavity.
- Permanent cosmetic damage to the baked-on Aluma-Shield finish.
- Reduced load capacity at the attachment point.
For most DIY installers, the safest approach is pre-drilling pilot holes at exact marked locations and using properly sized pop rivets rather than forcing oversized screws into aluminum channels.
Why Is Improper Slope the Most Common DIY Failure?
Improper slope is the most common DIY failure because homeowners frequently install gutters level rather than pitched toward the downspout. According to My Gutter Doctor, incorrect gutter pitch leads to leaks from the end opposite the downspout and potential water overflow. The standard rule requires a 1/4-inch drop for every 10 feet of gutter run, which appears almost imperceptible to the naked eye.
Without a level and careful measurement, most DIYers assume a visually straight gutter is correct. Even slight deviations create standing water that accelerates corrosion, breeds mosquitoes, and adds unnecessary weight to brackets. Checking slope with running water before final fastening prevents this entirely.
How Do You Avoid Voiding Your Pergola Warranty?
You avoid voiding your pergola warranty by confirming that any gutter attachment method aligns with the manufacturer’s approved modifications. According to Southern California Patios, any unauthorized modifications to an Alumawood patio cover, including the addition of new work not specified in the original scope, can void the manufacturer’s material warranty.
Steps to protect warranty coverage:
- Contact your installer or dealer before adding gutters to confirm approved methods.
- Avoid painting any Alumawood surface, as this voids the finish warranty.
- Document the original installation scope and compare planned modifications against it.
- Use non-invasive mounting solutions where possible, such as adhesive brackets or clamp systems.
When in doubt, consulting a certified installer protects both your investment and your coverage.
How Do You Maintain Gutters on an Alumawood Pergola?
You maintain gutters on an Alumawood pergola through routine cleaning, sealant inspections, and bracket checks. The following subsections cover cleaning frequency for desert environments and signs that brackets need replacement.
How Often Should You Clean Gutters in a Desert Climate?
You should clean gutters in a desert climate twice per year when nearby vegetation is limited. According to Gauntlet Gutters, rain gutters in arid climates like California typically require only biannual cleaning because buildup consists primarily of accumulated dust and small debris rather than heavy leaf litter.
Schedule one cleaning before monsoon season and another after it ends. Desert dust, windblown sand, and occasional seed pods can settle in gutter channels between storms. Even without trees overhead, fine particulate matter compresses into a layer that restricts water flow over time. During each cleaning, flush the downspouts with a garden hose to confirm unobstructed drainage. Catching minor blockages early prevents the pooling and overflow that lead to foundation-level water damage.
What Signs Indicate Your Gutter Brackets Need Replacement?
The signs that indicate your gutter brackets need replacement include visible sagging along the gutter channel, brackets pulling away from the fascia, water pooling in sections that previously drained correctly, and rust or corrosion at fastener contact points.
Because aluminum has a thermal expansion coefficient of approximately 23 x 10⁻⁶ /K, repeated heating and cooling cycles in desert climates stress bracket connections more than most homeowners expect. Watch for these specific warning indicators:
- Gutter sections that visibly tilt or sag between mounting points.
- Gaps forming between the bracket flange and the Alumawood fascia surface.
- Pop rivets that feel loose or spin freely when touched.
- Discoloration or white oxidation around fastener holes.
- Water spilling over the gutter edge during rain despite correct slope.
If brackets loosen, the gutter’s pitch shifts, and drainage fails. Replacing worn brackets promptly protects both the gutter system and the Alumawood structure underneath. For homeowners unsure whether bracket wear is affecting performance, a professional inspection offers clarity before small issues escalate.
With a solid maintenance routine established, knowing when to call a professional can save both time and your pergola’s warranty.
When Should You Hire a Professional Instead of DIY?
You should hire a professional when your pergola requires precise drainage integration, warranty-safe modifications, or structural alterations beyond basic gutter mounting. The sections below cover how Royal Covers approaches integrated drainage and the key takeaways from this guide.
Can Royal Covers Design a Pergola With Integrated Drainage?
Yes, Royal Covers can design a pergola with integrated drainage. With over 45 years of experience building shade structures engineered for Arizona’s desert climate, Royal Covers specializes in custom Alumawood patio covers and pergolas that account for water management from the initial design phase. This approach eliminates the risks associated with aftermarket modifications, since unauthorized changes to an Alumawood patio cover can void the manufacturer’s material warranty, according to Southern California Patios.
Royal Covers handles every stage of the process:
- Free on-site design consultation to assess drainage needs.
- Permit and HOA approval management.
- Professional installation by full-time, continuously trained teams.
- A 2-year workmanship warranty plus limited lifetime manufacturer coverage.
When drainage is built into the original design rather than added later, the system accommodates aluminum’s thermal expansion and maintains proper gutter pitch without compromising structural integrity. For homeowners who want reliable water management without warranty concerns, starting with a professionally designed system is the most practical path.

What Are the Key Takeaways About Attaching Gutters to an Alumawood Pergola?
The key takeaways about attaching gutters to an Alumawood pergola center on material compatibility, proper slope, and warranty awareness. Alumawood’s hollow aluminum extrusions require specific fasteners like pop rivets, not standard wood screws, and the gutter system must maintain a 1/4-inch drop per 10 feet of run to prevent pooling.
The most critical points to remember are:
- K-style aluminum gutters mount directly to Alumawood fascia surfaces.
- UV-rated silicone or polyurethane sealants accommodate thermal expansion at joints.
- Improper pitch remains the most common DIY failure, causing leaks and overflow.
- Unauthorized modifications can void the Alumawood finish and material warranty.
For straightforward single-run installations, a careful DIY approach works well. For complex layouts, multi-directional drainage, or structures still under warranty, consulting a professional like Royal Covers protects both the investment and long-term performance.